How to Polish Concrete by Hand: Step-by-Step Guide

Concrete hand polishing is also a useful skill to use on small DIY jobs. It can be used in narrow rooms that large machines cannot access. Homeowners who desire a say in the finish also find hand polishing to be a cost-effective option.
It is more time-consuming than machine polishing, but it can be precise. Depending on your patience, you can have a smooth matte or mirror-like gloss. You will get to know the step-by-step approach in this guide.
We shall discuss the tools, level of grit, covering tips, prevention and professional instructions. Ultimately, you will become familiar with the process of hand-polishing concrete.
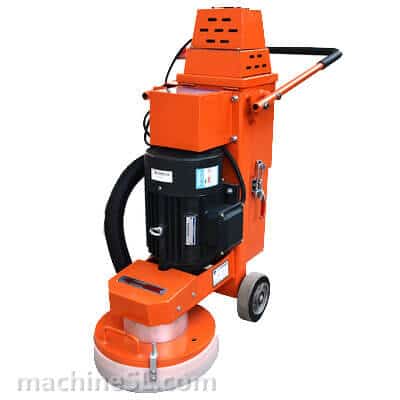
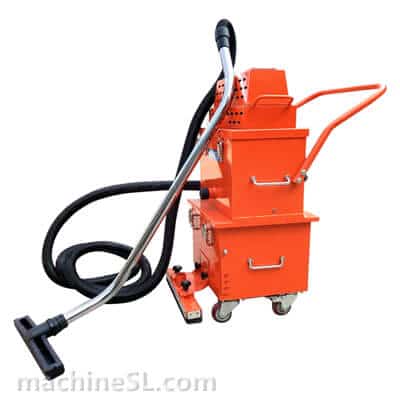
floor polishing machine cost start from $400


Contents
Understanding Concrete Polishing
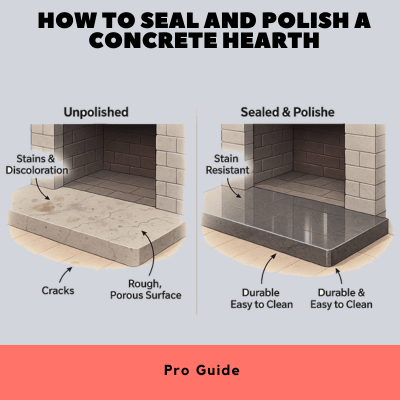
Not all polishing of concrete is sanding. It is a combination of grinding, densifying, and sealing. All phases convert a crystalline texture into a durable and presentable exterior. The benefits are clear.
Polished concrete is rough and inexpensive to maintain. It is less likely to get stained and dusty compared to untreated surfaces. It also does not look bad, either soft matte or polished gloss. It’s eco-friendly too.
Polished concrete is not based on a coating or wax, as is the case with the slab. It does not require any additional chemicals or covers. However, there are limits to hand polishing. It takes more time and effort.
A countertop, small floor, or patch job is the best one with it. A walk-behind machine is quicker when it comes to covering extensive surfaces.
Tools & Materials You’ll Need

Adequate tools and materials are necessary to carry out the polishing process perfectly. Then, you must prepare the appropriate tools before you start. The tools and materials required are the following:
- A hand grinder (or angle-grinder) and polishing discs. This is the main tool for polishing by hand. A compact grinder gives you control over small surfaces and edges. Make sure it has enough power to run diamond pads smoothly.
- Diamond polishing pads in different grits. Pads are what actually grind and polish the concrete. Coarse-grit first and fine-grit afterwards to polish. Good quality pads are durable and produce more consistent results.
- A vacuum/dust extractor (preferably HEPA). The production of concrete emits silica dust, which is toxic. A vacuum keeps the working environment clean and safe. A HEPA filter collects small particles which a typical shop vac would not be able to capture.
- Wet polishing (You want to use a water spray bottle). Wet polishing not only eliminates dust but keeps the pads cooler. It serves to smooth out a finish as well. Just remember that you should clean up the slurry afterwards.
- Safety gears: breathing mask, earplugs, goggles and hand gloves. PPE is essential. Chips can hurt your eyes, and dust can hurt your lungs. Gloves increase improved grips, and ear protection reduces noise to exhaustion.
- Optional: concrete densifier, stain guard or sealer. These finishing products offer longevity to your finish. Hardening the surface is provided by densifiers, and anti-stains and anti-moisture sealers are used. They provide the power and the touch of professionalism.
Tool Comparison

- Hand grinder: These do exceptionally well in DIY chores. Small and affordable with a portability advantage. Bonds coping and corners very well, patch jobs.
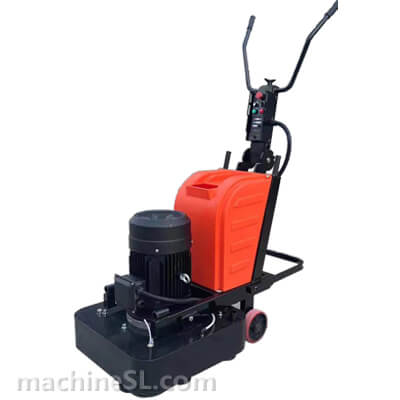
- Walk-behind machine: It is for medium and large spaces. It is far quicker, but also expensive, noisier, and heavier. More suitable where full-floor jobs are involved.
Step-by-Step Process: Polishing Concrete by Hand

Hand polishing for the concrete surfaces can be achieved by following the procedure. You can follow the below steps for the desired finish.
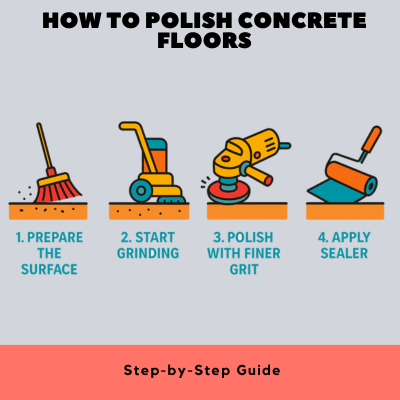
1 Preparation & Surface Check
Clean the surface first. Erase dust, stickers, paints or oils. Any residue will block proper grinding.
Check the slab for cracks or holes. Put an epoxy or filler into them and dry. When using new concrete, allow at least 28 days to pass before polishing.
It provides a stable surface, PO2 cleans it, and then the surface is polished smoothly.
2 Initial Grinding (Coarse Grit)
Begin with a 50-grit diamond pad. This removes surface flaws and opens the concrete. You may expose aggregate, depending on depth.
Keep the grinder steady and overlap your passes. This prevents uneven spots. Use a vacuum cleaner to remove grit after grinding, then proceed to the next grit.
3 Progressive Grit Polishing
Move through the grits step by step:
Take the grits one step at a time:
- 100-grit: It eliminates scratches produced by 50-grit.
- 200-grit: It lubricates the surface; there is a slight shine.
- 400-grit: It is the mediocre polish, with rustic or industrial appearance.
- 800-grit: It gives a smooth, polished look.
- 1500-3000 grit: It gives mirror-like, and ultra glossy finish.
At each stage, clean between grit changes. Don’t skip levels or scratches will remain visible.
4 Densifying (Optional but Recommended)
Apply a concrete densifier around the 200–400 grit stage. This chemical hardens the slab and reduces dusting. It also improves gloss when you move to higher grits.
Let it dry fully before continuing polishing.
5 Final Sealing & Protection
Once you’ve reached the desired polish, clean the surface well. Remove all dust and residue.
Seal, or lay after a stain protection. A topical sealer adds gloss to the natural appearance. It gives a penetrating one that prevents fading. Lightly burnish the surface to give additional gloss.
Allow proper curing time before heavy use.
Safety Best Practices

Polishing of concrete is about safety. Silica is included in concrete dust and can damage your lungs. Wear a respirator/dust mask.
Eye protection is a must. Serious injuries are caused by chips or dust. Work is also safer and more comfortable with gloves and ear protection.
Manage cords and tool handling carefully. Grinders can kick back if misused. Keep a steady grip and work in controlled motions.
Whenever possible, use wet polishing or a dust extractor. Both methods reduce airborne dust.
Common Mistakes to Avoid

Polishing by hand takes patience. Many beginners affect the finish by carrying out some inappropriate actions. Avoid the following mistakes as a beginner.
- The biggest mistake is skipping grit levels. This leaves visible scratches that show even after sealing. Always follow the grit sequence.
- Another error is rushing the process. Uneven pressure creates swirl marks. Take your time and keep the grinder moving.
- Avoid using cheap or wrong pads. Low-quality discs wear out fast and leave poor results. Invest in proper diamond pads.
- Don’t forget to densify and seal. Without this step, the surface wears out faster.
- And never polish before the concrete has cured. Fresh concrete is weak and won’t take polish properly.
Cost & Time Considerations

Hand polishing concrete is affordable compared to hiring pros. You will need to buy pads, a grinder, and a sealer. For small areas, the cost is manageable.
Expect to spend between $100–$300 for tools and materials if you already own a grinder. Professional services can cost several dollars per square foot.
Time is another factor. A small countertop or patch may take a few hours. A medium floor area can take days. Large projects are best left to pros with machines.
If you value speed and perfect results, calling a contractor is worth it.
Expert Tips for Best Results

Some tricks can make a great difference to pros. Here are some of them.
- The grinder must always be in motion. Sitting in one place produces dents.
- Using wet polishing also minimizes dust on the result and produces a smoother look. It also prolongs the life of pads.
- Job in bits, particularly on big slabs. This assists in maintaining a coating of the polish on the surface.
- Choose what you want to be finished before you do it. Stop at 400-grit to leave it matte or rustic.
- Go to 800 or higher for gloss. Board finish 1500 3000 grit, sealer, burnishing finish.
FAQs
Can you polish concrete without a grinder?
Yes, but it’s difficult. It can be sandpapered or hand-padded on a very small surface, such as on the edges or on furniture.
What’s the cheapest way to polish concrete?
The least expensive home-built choice involves a hand grinder having a couple of pads. Hiring professionals to rent equipment to fill a bigger space costs less.
How long does polished concrete last?
Good concrete with its polish can last decades when it is sealed and properly maintained. It does not wear out and just needs to be sealed off periodically.
Is hand polishing suitable for countertops or furniture?
Yes. Working with concrete countertops, sinks or small slabs, hand polishing is satisfactory. It brings the total freedom to control details and edges.
Do you always need a sealer?
Yes. A sealer is available against spots, water, and tears. A penetrating sealer is advisable even when an unnatural appearance is desired.
Conclusion
Hand-polishing concrete is a fulfilling project. It is prepared, gritted to various degrees of gritness, densified and sealed.
A smooth matte finish or glossy finish can be obtained with patience. It is better in small spaces, countertops, or ornamental surfaces.
On a large floor, commercial polishing is quicker and more effective. When used correctly and without errors, concrete that is hand-polished will last decades. It is handsome, long-lasting and low-maintenance: a finish worth the rest.


Leave A Comment